How to Make a Soda or Beer Can Lantern Using a Dremel |
||||
|
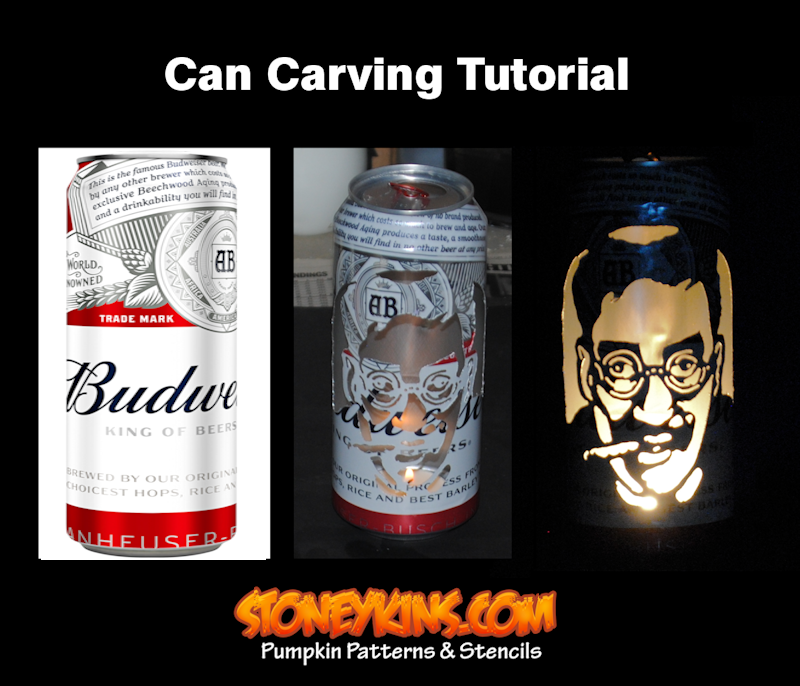
#1 This is what we will be making.
 | ||||
|
#2 First get yourself an Empty 16oz Can Or Empty one yourself !  You can use a Soda or Beer Can Does not matter the brand, but pick a can that's colorful, and with well known name/logo. 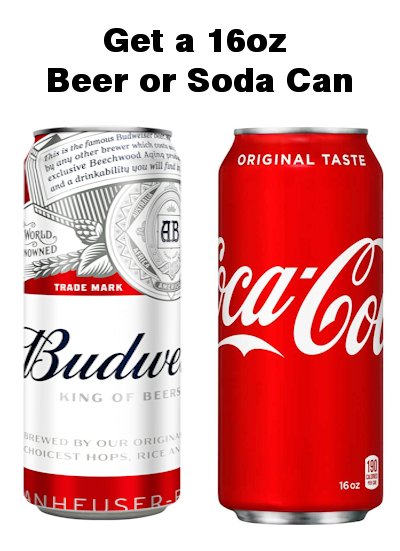 | ||||
|
#3 Resize and Print your Stencil The Stencil should be 5 inches High Look at our other tutorial on How to Enlarge or Shrink Your StoneyKins Patterns 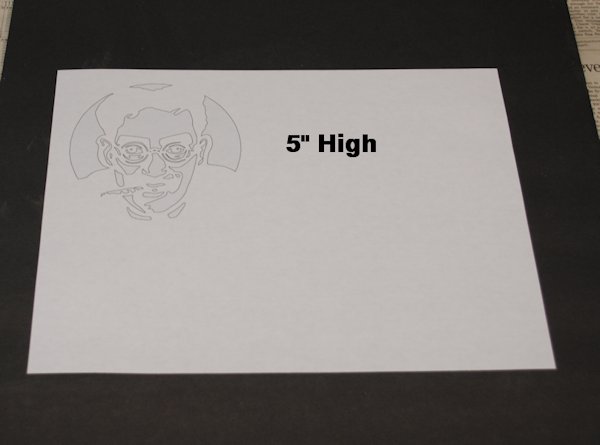 | ||||
|
#4 Trim the Stencil Trim the Stencil with a pair of scissors, and get ready for Glue For this project, were using Elmer's Washable Purple Stick Glue It gives a very good bond and dries fast. 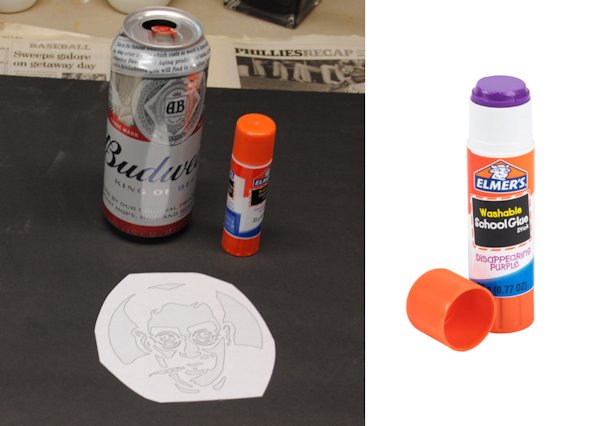 | ||||
|
#5 Place Glue on back of Stencil Just swirl the glue stick on the stencil, until the whole back is covered. You only need a thin layer of glue. 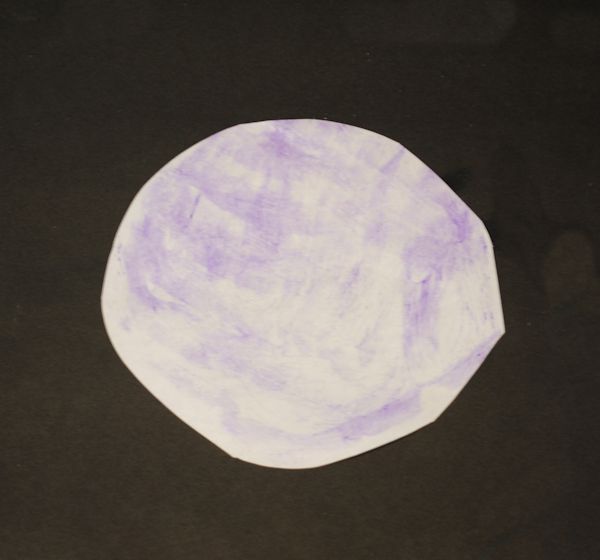 | ||||
|
#6 Place the Stencil on the Can Center the Stencil on the Can, Smooth it out to remove any air bubbles. Be gentle you don't want to make dents in the Can. Keep that in mind during the entire process. 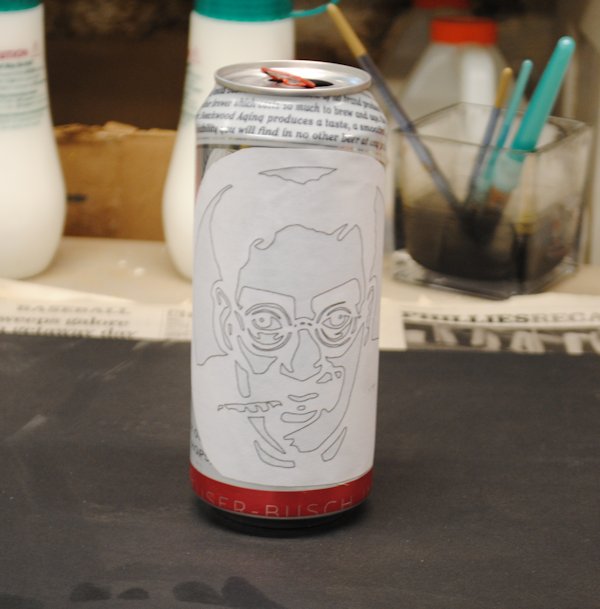 | ||||
|
#7 Saftey is a MUST ! Do NOT start carving unless you have on a pair of saftey glasses or saftey goggles. you do not want to get a peice of flying metal in your eye. Also remember, all cut areas and the top of the can will have Sharp Edges. So be careful not to get cut ! 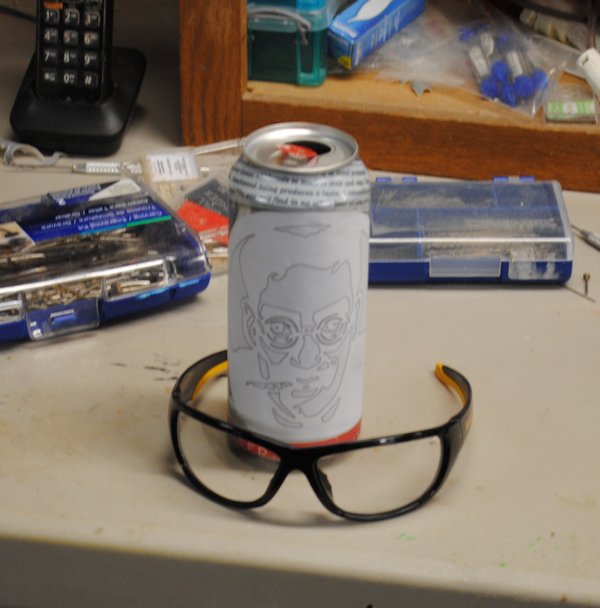 | ||||
|
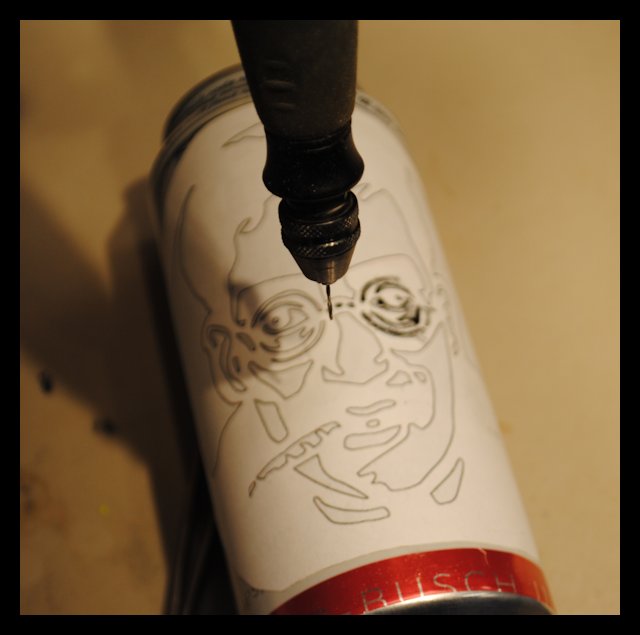
#8 Let's start carving Go Slow, and don't Dent the Can. Slow Meaning Carve Slow, the Dremel itself can be on full speed. The bit were going to use is a #66 drill bit, this is equivalent to a 1/32" bit. place the bit in the dremel so only a little is sticking out. Have a few bits handy, for you may break a few. as always we recommend using both a Flex Shaft and a Speed Chuck.
 | ||||
|
#9 And were Still Carving Like a Pumpkin, carve from the Center out ! 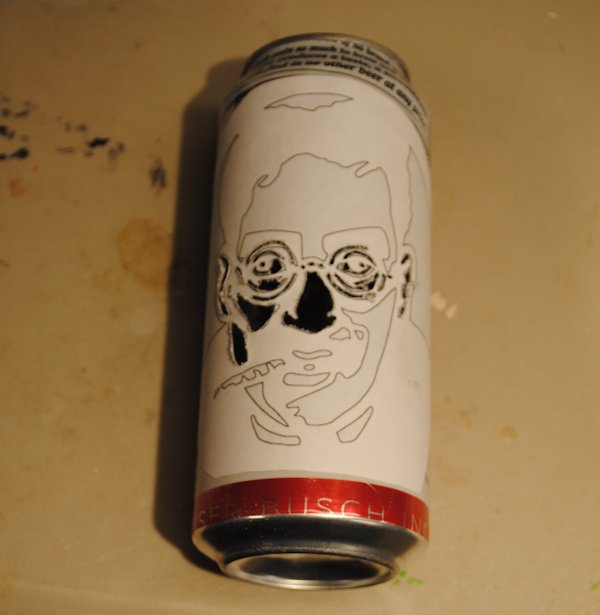 | ||||
|
#10 Once Carving is Complete It's time to remove the Bottom Disc. You want to cut the inside Circle out (Highlighted in yellow) Some folks will use a 1/8" Drill bit, or a Box cutter etc... to cut the disc out We will show you the Best and Easiest way to do this! Some folks will also remove the top, but I don't like that look, It's ruins the overall look of the can, that is an importaint factor in the art... This is why you should also pull the tab up a little (so it's seen). As long as the tab was punched / pushed in, this will vent the can enough if a Real tea light candle is used.  | ||||
|
#11 Remove bottom Disc with Can Opener Just use a Can Opener, you need to make sure you have the right angle Easy Peasy ! 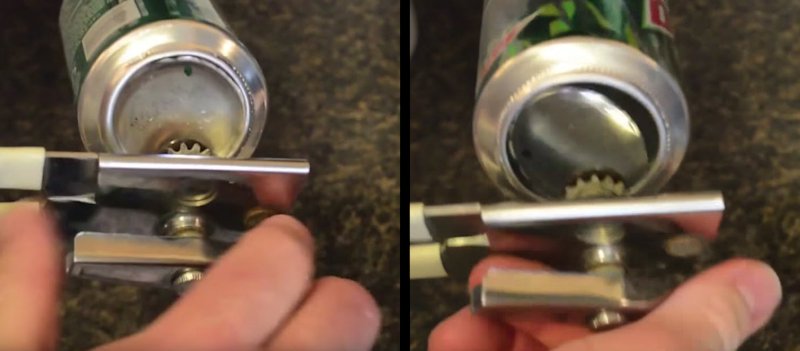 | ||||
|
#12 Bottom Disc Removed Now it's time for CleanUp! 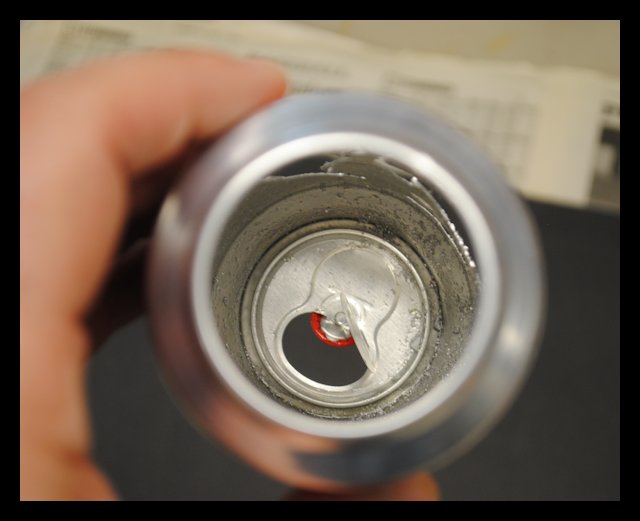 | ||||
|
#13 Remove Stencil Just start removing the Stencil as you can see, you can just peel it off. Side Note: for small area's, a good pair of Twezzers could be your friend. 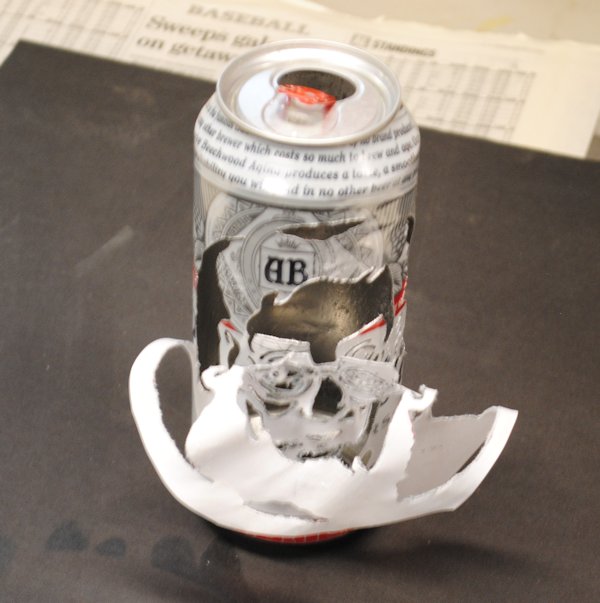 | ||||
|
#14 Rinse off Remaining Stencil and Glue Just Rinse in a Sink under hot water. If you have a Section still hard to get off, then give it a nice Soak. 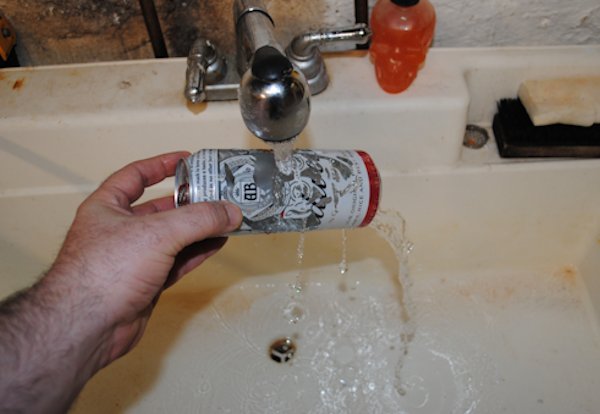 | ||||
|
#15 If you do need to Soak To not waste water, Just place it in a Large Cup, or small Sand Bucket and Fill with Hot Water.. Let soak for 20 minutes.. then wipe with a wet rag, or a soft bristle brush because of the size, you could even use a tooth brush.  | ||||
|
#16 Our Can is Clean and Ready to Light 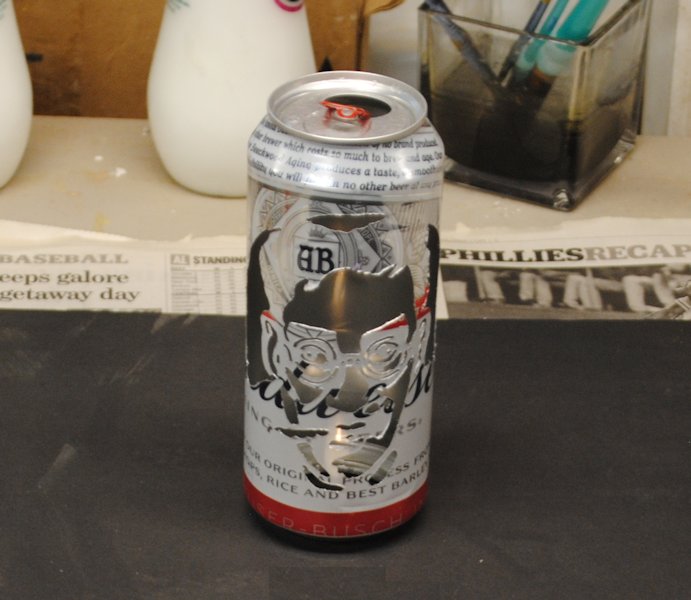 | ||||
|
#17 Lighting Options There are Many Different Lighting Options, here's a Few ! 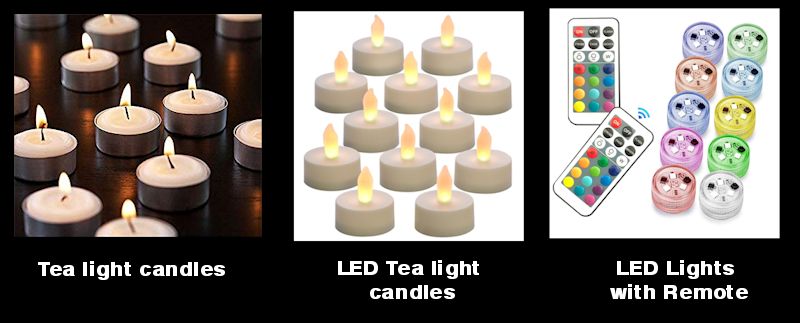 Keep in mind, if using Real Tea Light Candles, The can will get HOT. So watch when handleing it, so you don't get burned. 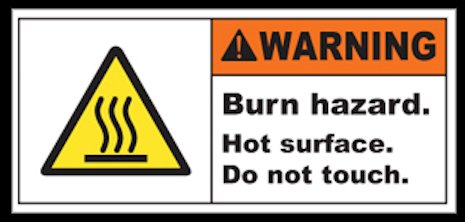 | ||||
|
#18 Here's our carved can Lit up !  | ||||
|
#19 You Can also make them Sparkle ! Most craft stores Sell Glittler Sheets, available in many different colors Add a Chunck inside the Can. NOTE: Use ONLY LED Lights if Adding paper inside the Can. Or you could start a Fire. 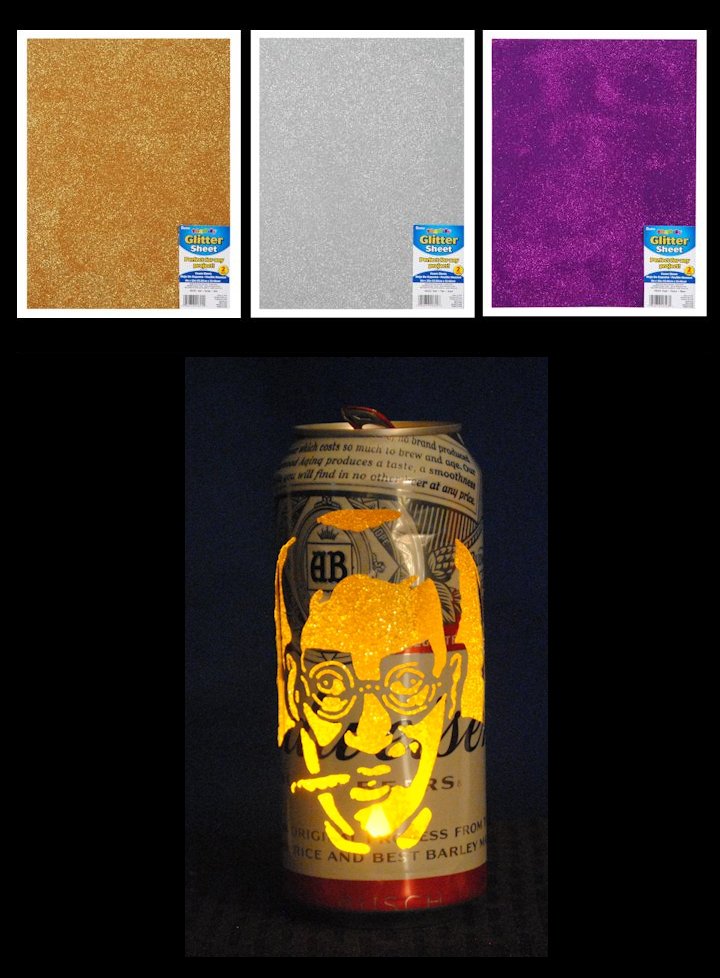 | ||||
| ||||
CARVING TOOLS - MEDIA - LINKS - SITE MAP - CONTACT US