How to Carve a Foam Craft Pumpkin Using a Dremel |
||||
|
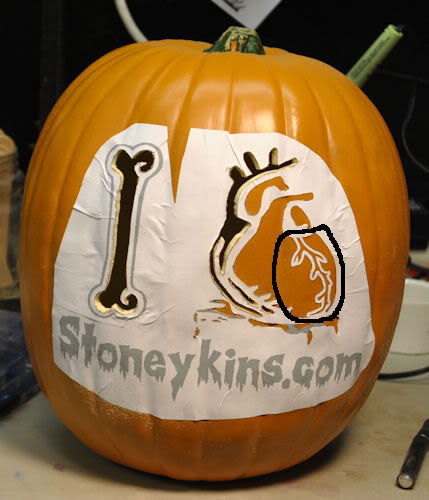
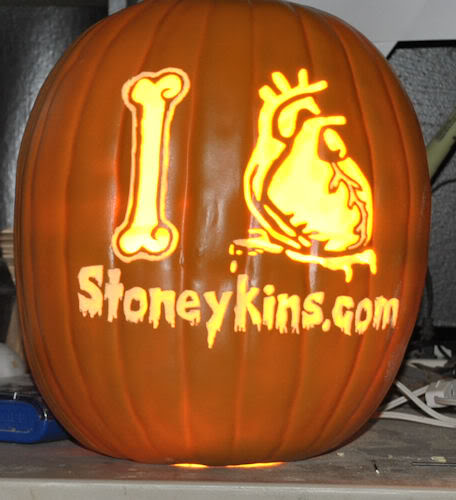
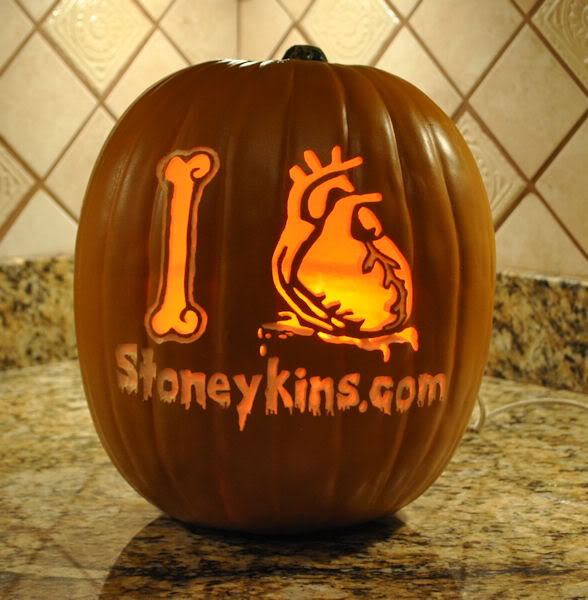
#1 This is what we will be carving.
The Tutorial is based on using full sheet Sticker Paper & X-acto Knife.
For Pattern Transfer. And Carving the pumpkin with a Dremel  | ||||
|
#2
First Print Out your Pattern On Full Sheet Sticker Paper You Can buy Full Sheet Sticker Paper at Any Office Supply Staples, Office Max, Office Depot etc..... We Found the Best Deal Online: 100 Sheets for $10.45 We Use the "Standard White Uncoated Scored" ( INKJET/LASER Permanent )
To Print the Pattern I use a Poster Program There's a Full Tutorial on The best way to Print your Patterns
| ||||
|
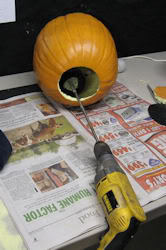
#3 Cutting the Hole in the Bottom
I normally cut a 4 in hole in the bottom
Big enough for my hand to fit or a Paint stripper Wheel for removing the Lines inside. (Normally foam pumpkins from Michael's Craft Stores) Have these extra Lines inside that need to be grinded down). or they will cast black shadow Lines across your carving.  To Cut the Hole I use:
1) a Pencil (to draw the 4 inch circle) 2) A 4" PVC Coupling used as a template for a perfect Circle 3) A 6" Finlander Fillet Knife
Be very careful the blade is Sharp!  Using this knife will give you a Nice Snug Fit, So you can Plug it Back when the carve is Complete.
Use the 4" PVC Coupling to mark the Circle
I Also Add one small Line Across the Circle (with a Grease Pencil), to show how to place the plug back in.  Cut with the Fillet Knife TIP: dip the knife in some WD-40 It will cut much Better. When Cutting use an Up and Down Motion like using a Saw, Keep the Knife on a Slight Angle, This will stop the Disc from falling in, and Also make a Snug tight Fit. Once you go all the way Around just remove it out of the pumpkin
If the Pumpkin Does NOT have thick Foam Lines inside | ||||
|
#4 Removing the Black Lines
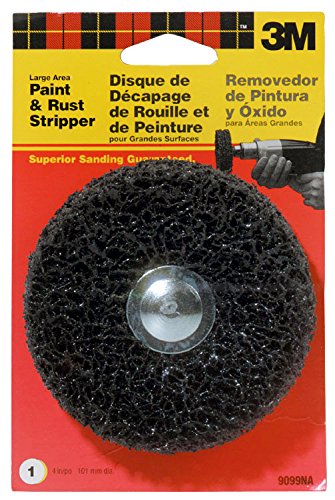
If your Pumpkin Has thick Lines inside,
To remove the Lines they Need to be Sanded Down. A Tip from Carver Doh: is to use a Paint Stripper Wheel with an extension Rod hooked up to a Drill. Paint Stripper Wheel:
Hopfully Next Year there will be No Black lines in the Pumpkin !
| ||||
|
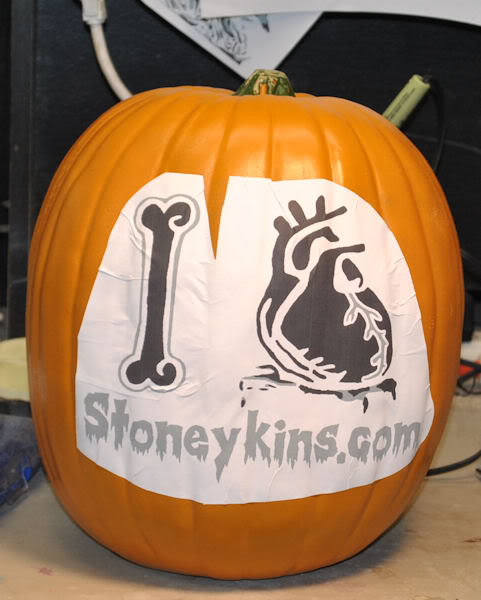
#5 PLEASE NOTE: Intstead of Using Sticker Paper I went Back to Glueing the Pattern on With White School Glue The New Pumpkins have very thin paint, and the Sticker Paper pulls the paint off the pumpkin!
| ||||
|
SKIP Steps #5 and #11 For Now (Until they fix the Paint Issues.)
Placing the Pattern on the Pumpkin
Peel the Paper Back off the Sticker Paper,
And place it center on the pumpkin,
I still will cut some lines in the pattern , and also will make sure any wrinkles fall outside the pattern Area.
a Tip is if you make the pattern a Little Damp, it will be easier to place on the Pumpkin.
You can use a Heat Gun, Or Hair Dryer to speed up the Drying
| ||||
|
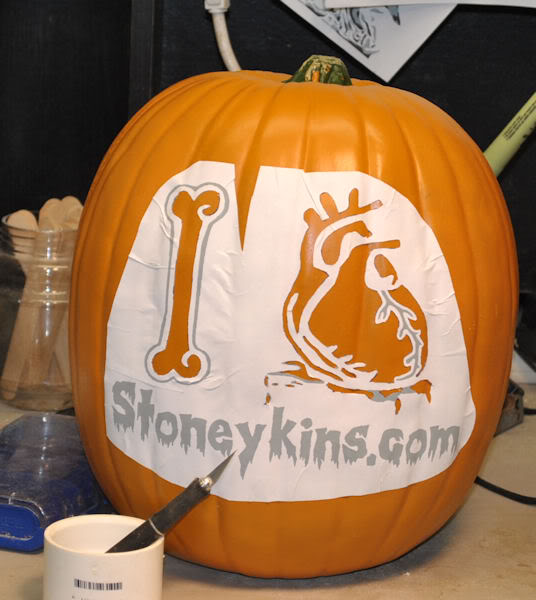
#6 Outlining the Cut-out Shapes
I normally SKIP this Step, I don't have the time you guys have to carve.
For this Tutorial - to give you the Cleanest Lines Possible.
We will use an X-acto Knife.
If you still want to Outline, but not use a Razor,
Okay X-Acto - Make sure you Buy a Comfy One, I recommend the X-Acto X2000
Make Sure the Blade is Sharp, their Cheap so replace the Blade if Dull.
Carefully go around each BLACK Shape and Remove the Sticker paper from that Shape.
You can use the tip of the X-acto to pull the sticker up, to get it started.
| ||||
|
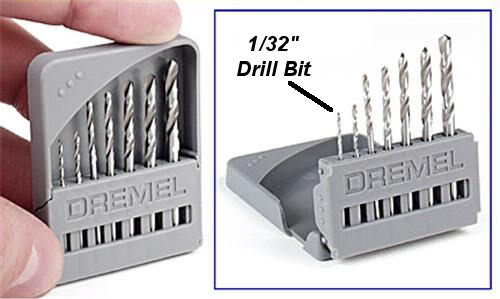
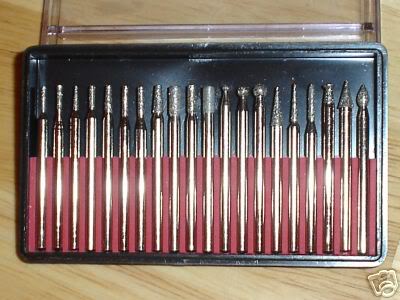
#7 Outlining the Cut-Out Shapes
If you don't already have this Dremel Drill Bit Set, Buy One !
Now these do Break from time to time, So Make sure you buy extra 1/32 bits.
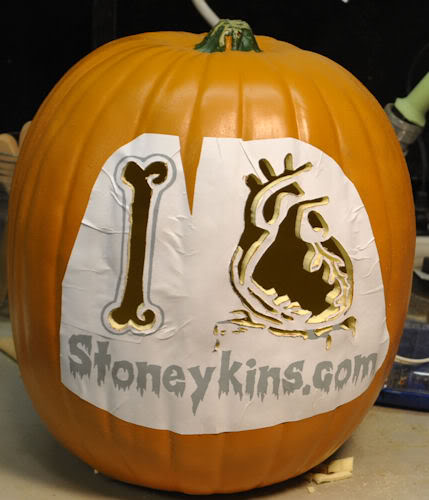
So Were going to Shade that NOW, then Cut-out the Two Shapes.
Here's Our Pumpkin With All the Cut-out Shapes Cut.
| ||||
|
#8 Outlining the Shaded Shapes
This Step is a MUST ! You can't Skip it, or your carve will not Look Nice & Clean.
Same As Before Were going to Use the X-acto:
| ||||
|
#9 Removing Paint & Rough Shading
Basically I use the Same type Bits for ALL Rough Shading.
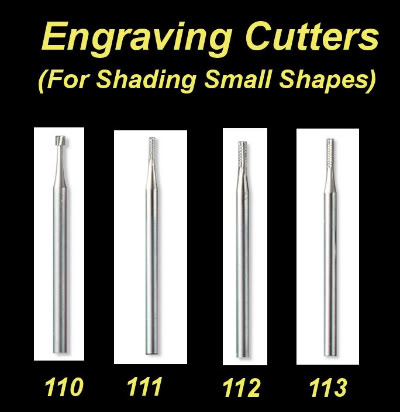
Shading Small Shapes
The Bits I use for Small Shapes or Lettering is these. .
These are Dremel Brand Bits. the Bit Number is below each Bit.
You Can Buy them Here $2.50 Each: https://widgetsupply.com/category/dremel-engraving.html | ||||
|
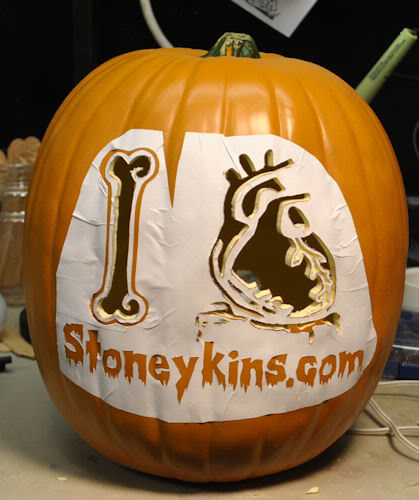
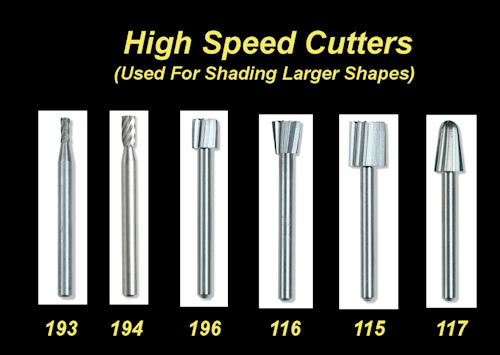
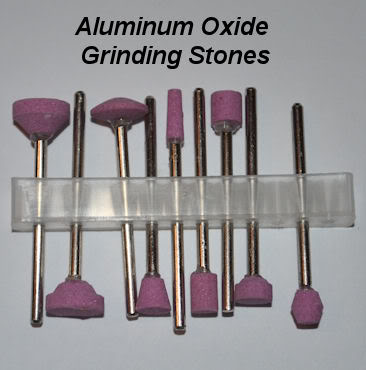
#10 Shading Large or Larger Shapes:
For Shading Larger Areas, Nothing Beats these Bits.
Bits 193 & 194 Will be Used More than the Others Shown
Here's the Pumpkin for Which I call Rough Shading Paint Removed, And Deep Enough ! | ||||
|
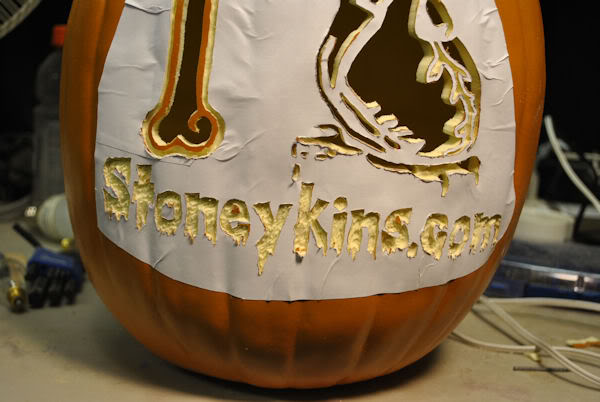
#11 Sticker Paper / Pattern Removal (NEW info)
There Has been Issue with Sticker Paper removing Paint from the pumpkin, in the past few years.
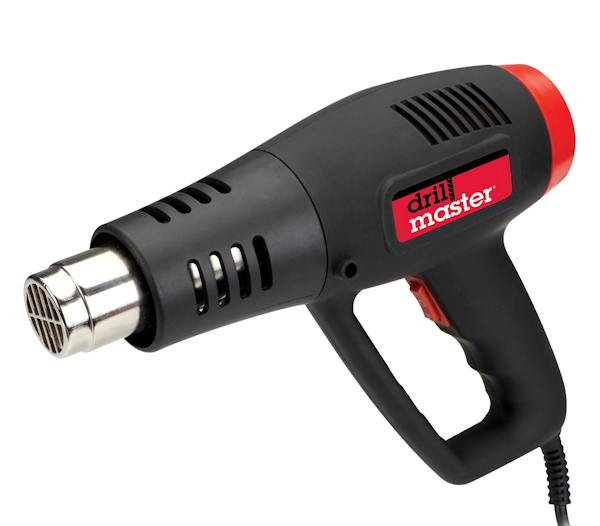
So We Recommend using a Heat Gun to warm the Stick up, while you remove it.
One can Purchase one at Harbor Freight for $14.00
| ||||
|
#12 Pattern Removal
This is one of the Best Benefits on using Sticker Paper.
and Smoothing out.
Just Remove ALL the Paper and Toss it in a trash Can. | ||||
|
#13 Smoothing Shading & Clean Up
For Smoothing Out the Shaded Area's
Diamond Bur Bits (For Small Shapes)
a) Diamond Coated Bur Bits (You can buy Complete Sets on ebay for Like 10 Bucks.)
Here's Our Cleaned up Shading, As Clean As I want it to be,
| ||||
|
#14 Cleaning the Finished Carve
This Is much Easier to Clean, Because of using Sticker Paper.
You will still want to toss it in the Sink to rinse off any Pumpkin Dust,
Just use a SOFT Bristle Scrub Brush on it. | ||||
|
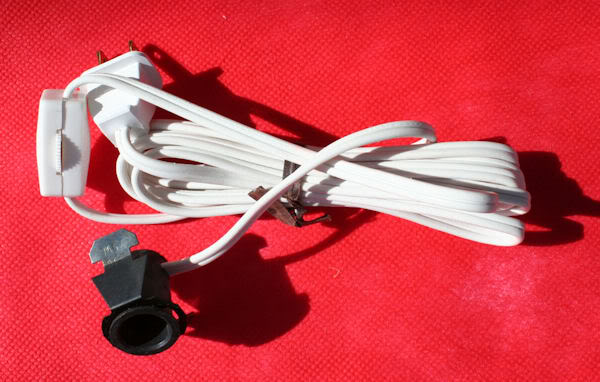
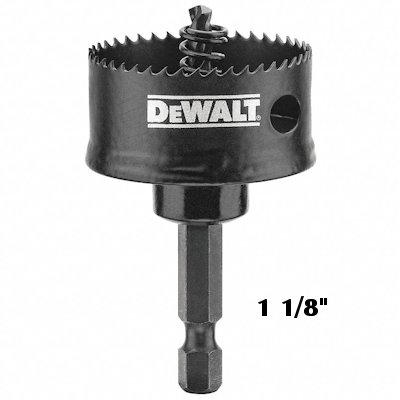
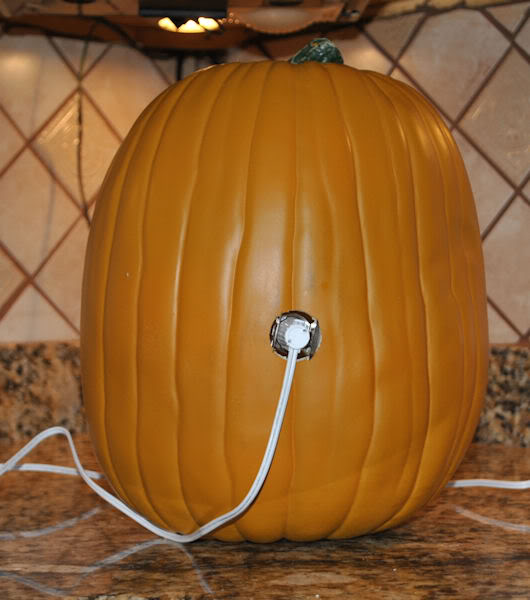
#15 Lighting the Pumpkin
For Lighting Foam Pumpkins, I Like to use Clip In Lights.
Here's a 1 1/8" Hole Saw. this Just Hooks up to your Drill
| ||||
|
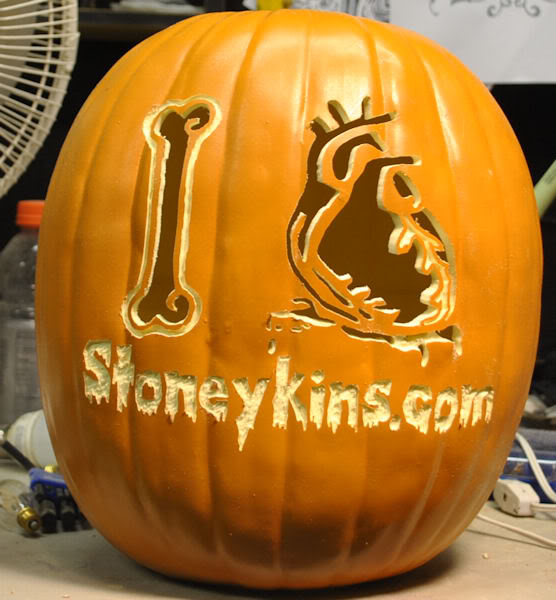
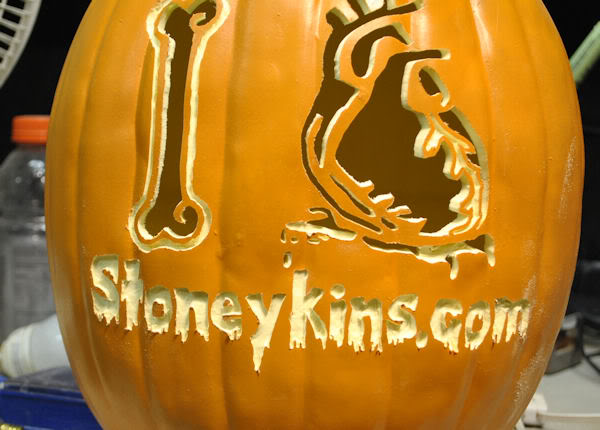
#15 Our Finished Carve
| ||||
| ||||


CARVING TOOLS - MEDIA - LINKS - SITE MAP - CONTACT US