How to Make Painted Cut Out Yard Art Using 1/2" Sanded Plywood
|
||||
|
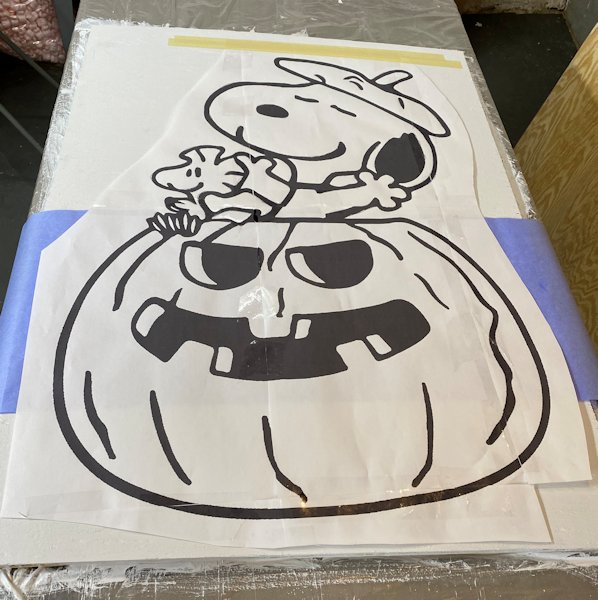
#1 This is what we will be Making.
The Tutorial is based on using a Poster Program to print the Pattern
1/2" Sanded Plywood, Craft Paint and Hardware to Mount it This Snoopy Halloween Piece is 36" Tall  For this Exact Project I'm including ALL Files - You will not Need a Poster Program If making this Snoopy I saved a PDF Full Pattern Size. It will Print out 12 Sheets of Paper. There is a Line Drawing and Color Version Also included. | ||||
|
#2
Blow-Up the Pattern to the Size you Want.
Now that we have our Pattern Picked Out
And We Know what Size we want to Make it.
We now need to Blow it up to the size we want. I use a Poster Program to do so. The Program I use is called Poster Printer There is a Link Below on How to Purchase and Use this Program. 
Get 25% OFF Poster Printer Using a Coupon Code Click the Link for Details https://www.stoneykins.com/How_To_Print_Patterns.html | ||||
|
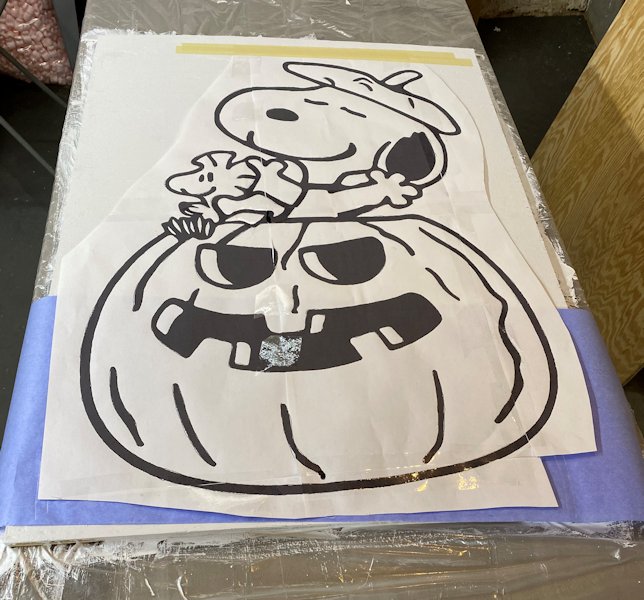
#3 Here's the Pattern Printed Out 36" High This is the Exact Same Process as the Pattern Printing and Transfer for a WindowKin.
https://www.stoneykins.com/Windowkin_1.html My Printer can print Paper That's 11" x 17" Which is what's Shown in this Photo Any Printer will work, by printing on Standard Printer Paper Sheets. 8 1/2" x 11" There will just be More Sheets to Tape together / Assemble. 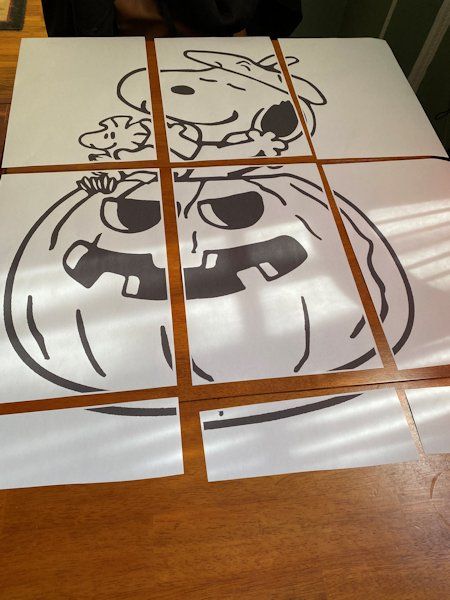 You will need to Trim the Sheets Then Tape them together Tape all the Seams. | ||||
|
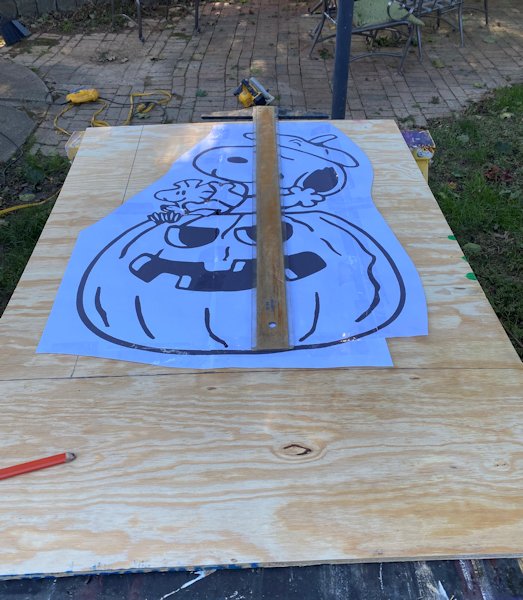
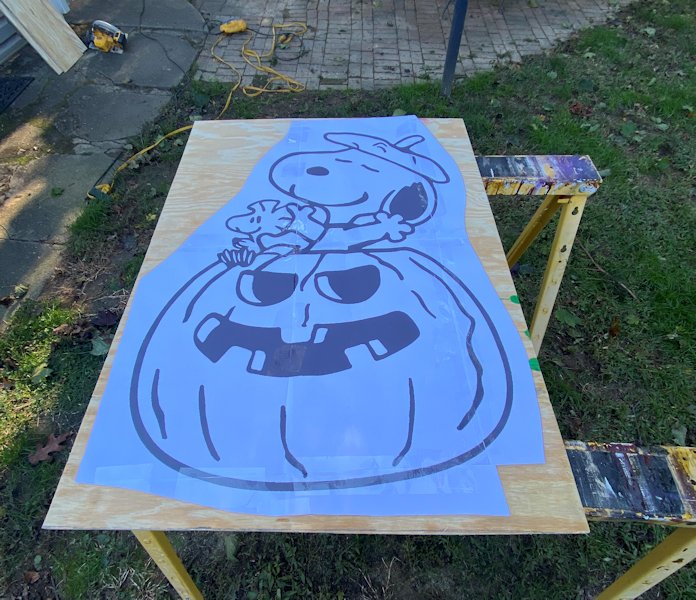
#4 Cutting the Plywood to Size Once your Pattern is Taped together Lay it on top of the Plywood I give the Board a Few extra Inchches all Around, This makes cutting the Shape Out, Much Easier Later On
Place the Pattern on the Plywood | ||||
|
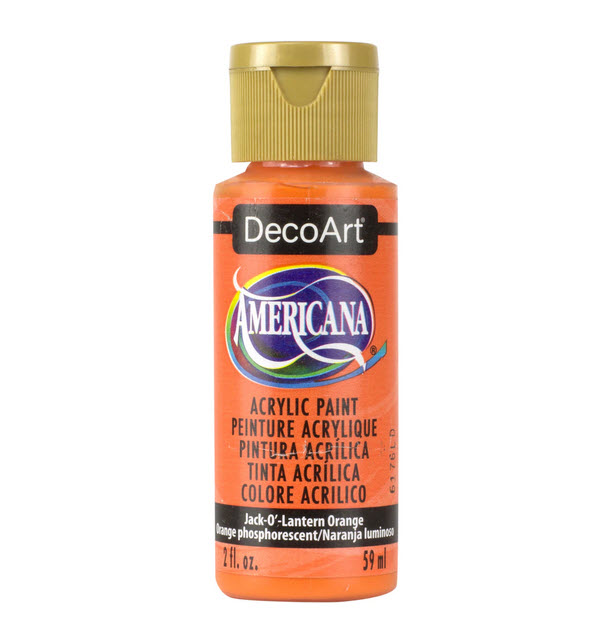
#5 Craft Paints Used for this Project Brand = DecoArt Americana Acrylic Paint
Snow Titanium WHITE - 16oz | ||||
|
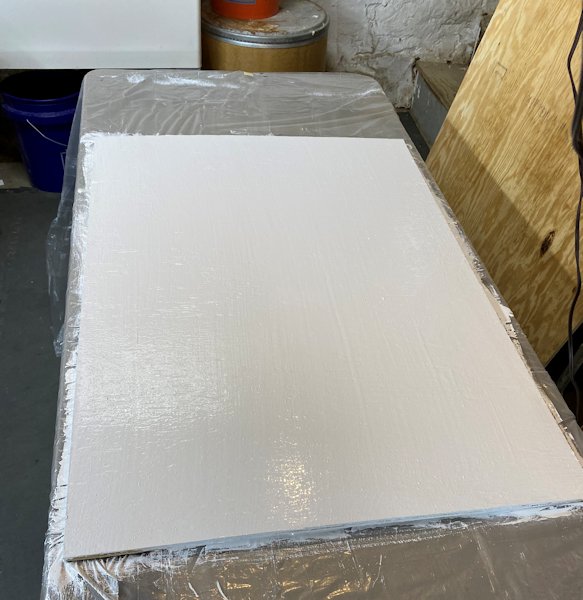
#6 Lets Paint the White Base Coat ( Two Coats ) Always Use White as the Base Coat! Use a Plastic Drop Cloth Underneath ( you could also just use a Plastic Tablecloth from the Dollar Store.) Pour Some White paint on the Board and Use a 2" or 3" Disposable Brush to cover the Board. 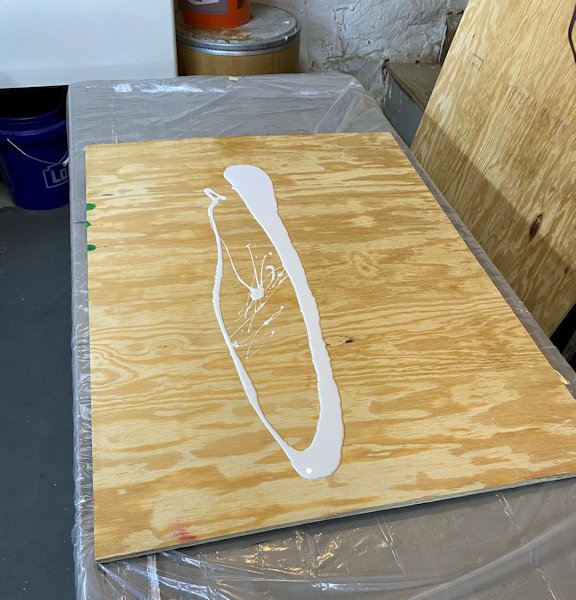 NICE and EVEN ! - Let Dry for a Few Hours
| ||||
|
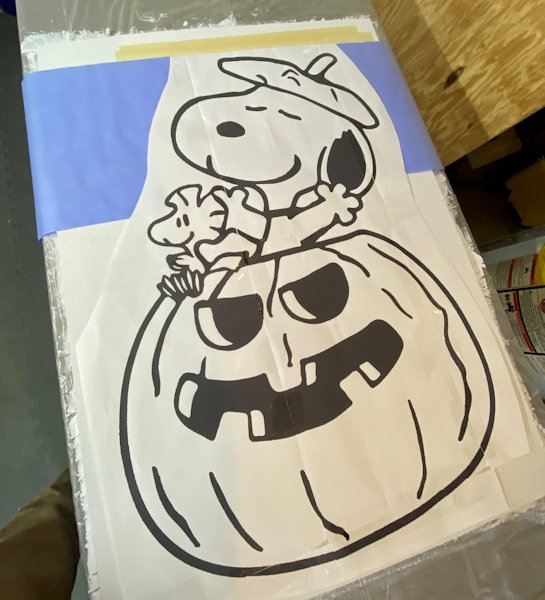
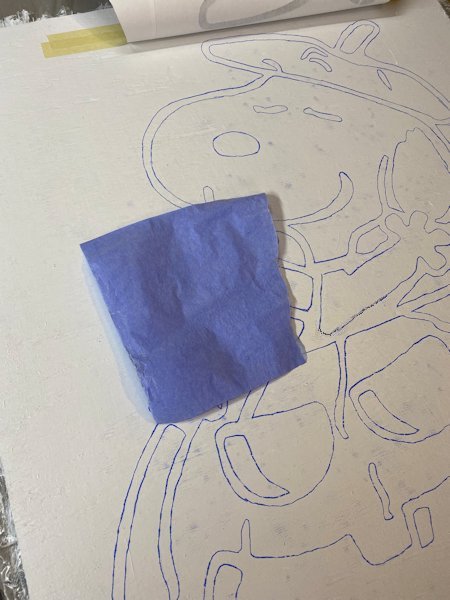
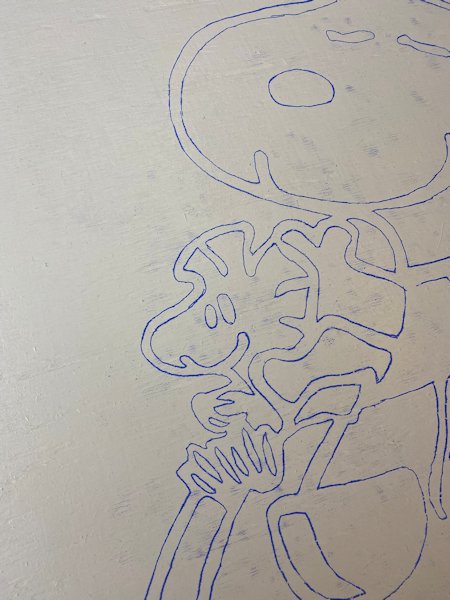
#7 Once the White Paint is Completly Dry We will Use Saral Transfer Paper for the Pattern Transfer You Can Use either Blue or Graphite on the White Base Coat. "Graphite is MUCH Better", (but I had Blue on Hand, So I used it) 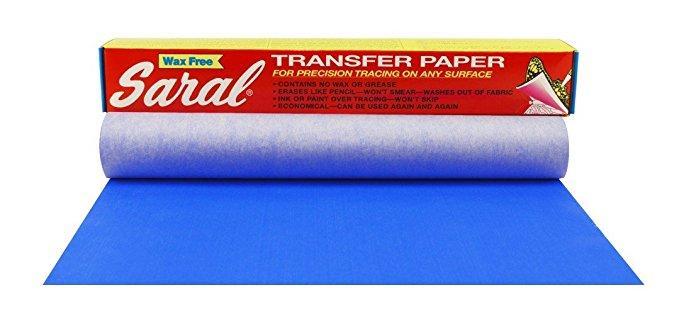 Securely Tape The Top of the Pattern To the Top of the Board Cut a Peice of The Saral Transfer Paper the Entire Width of the Board. You will use this one Sheet for the Whole Transfer. 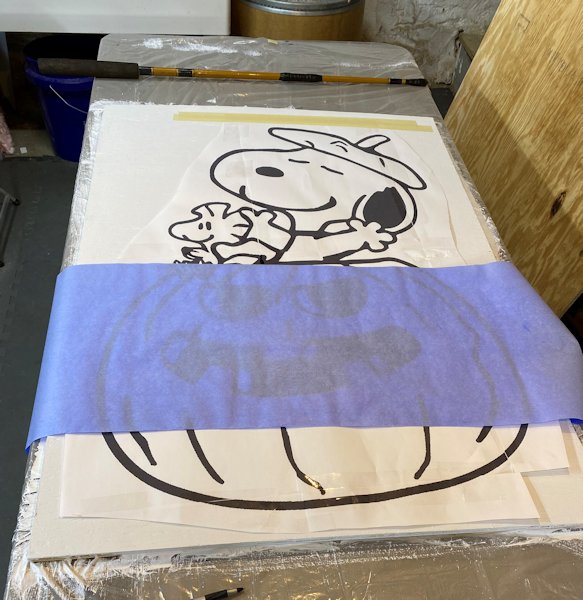 | ||||
|
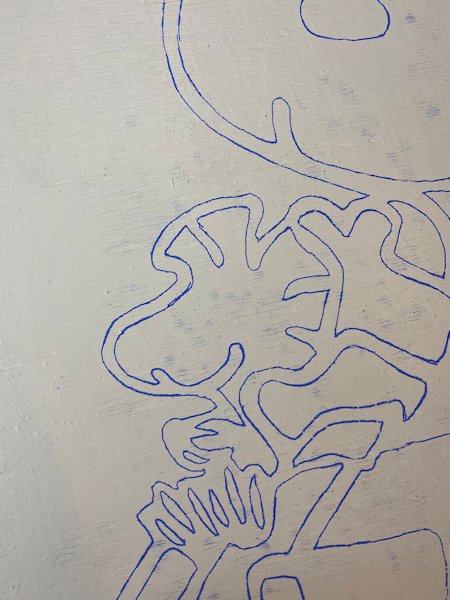
#8 Lay the Tranfer Paper Face Down, Under the Top of the Pattern Use a Ballpoint Pen and Start Tracing the Pattern Try not to Rub your Hand on the Work Space, this will Smear the Transfer Try to Only Move the Pen on the Paper Trace BOTH the Out-Side And Inside Lines. (this will give the right thickness with all the Lines in the Artwork. Many Other people that make these Cut-Out YardArt, Just use a Sharpie Marker and add Very thin Lines. My Way may take a little longer, but Will Look SOOOO MUCH Better!
Lift the pattern up and Pick up the transfer paper, and place it in the New Section). | ||||
|
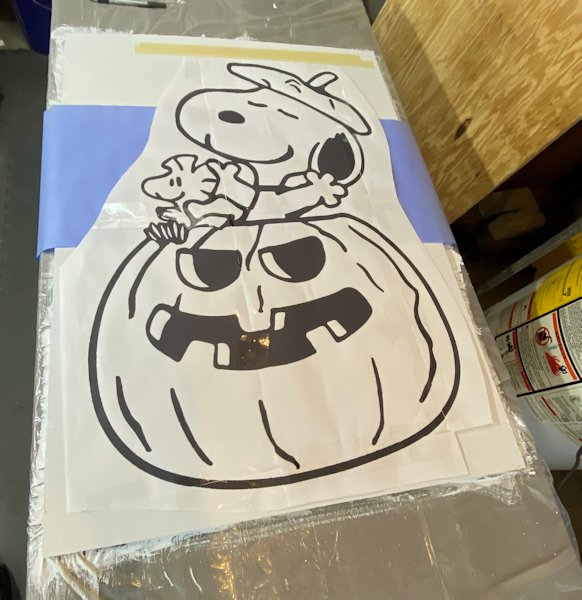
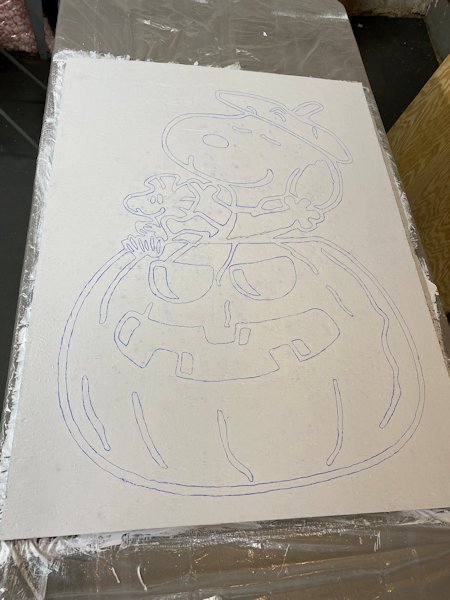
#9 Leave the Pattern Taped Down - Do NOT REMOVE It YET !
Lift the Pattern Up and Check that you Traced EVERYTHING ! Double Check !
I did this on purpose, See I missed WoodStocks Eyes !
| #10 Remove The Pattern
Once you are 100% Sure everything was Traced - Remove and Discard the Pattern | |||
|
#11 Time to Start painting the Black Lines and Shapes Tip to keep your Hand off the Painted Area (as you paint) And give your hand something to LEAN on - Use a a Mahl Stick to paint - You Can Make your Own. I Just use a Wood Dowl, with Wrapped Electrical Tape on the End to Form a Ball. I Also use Small Plastic Cups to Hold the Paint. Brushes Used For Outlining - #3 & #4 Round Brushes Start at the Top and work your Way Down 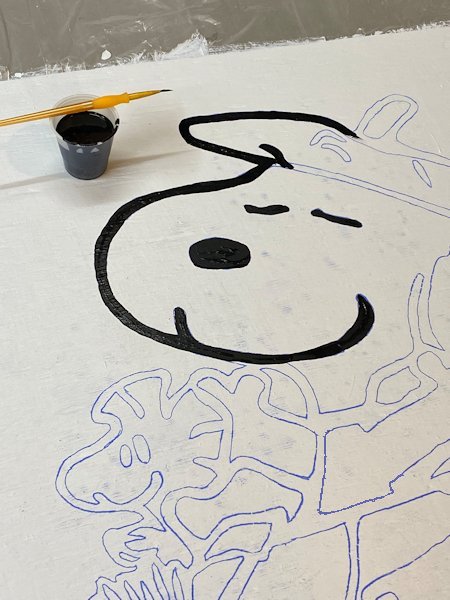 Looking Good Keep Going 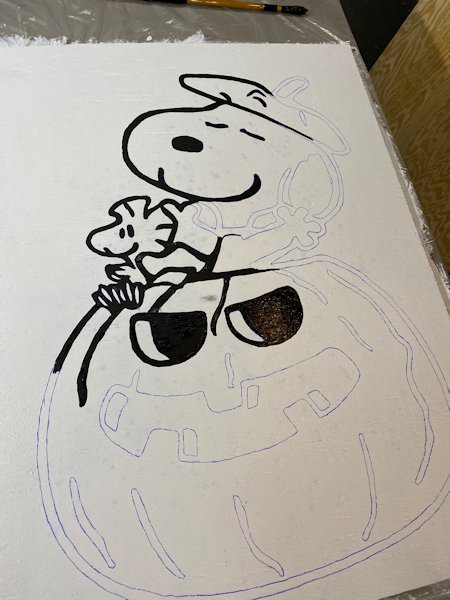 And Done with the Black (for Now). - Let Dry ! 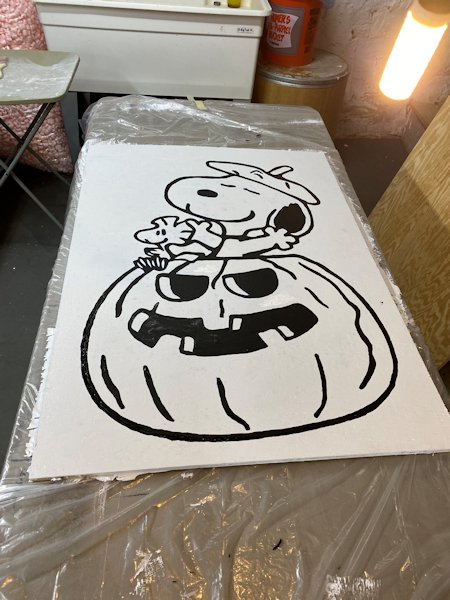 | ||||
|
#12 Now it's Time to Cut the Shape Out with a JigSaw Grab your Jig Saw And Drill - Corded or Cordless 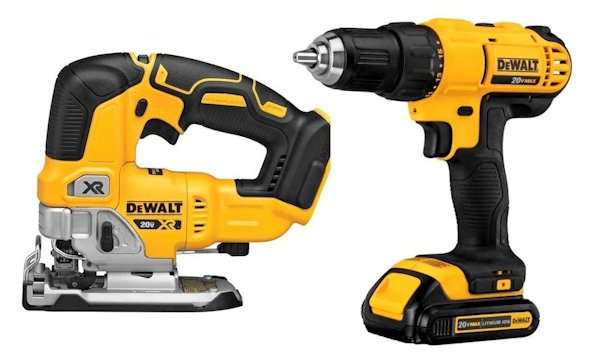 Before You Start Cutting Anything. Drill Some Holes where Sections need to be removed inside the Design this Helps Alot, you place the Saw blade in these Holes. Then Start cutting that Shape I used a 13/32" Drill Bit for these holes 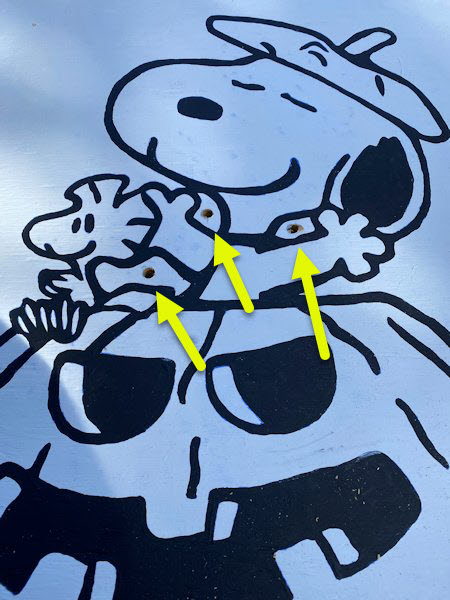 I will Also Add Some Holes in Tight Spaces, 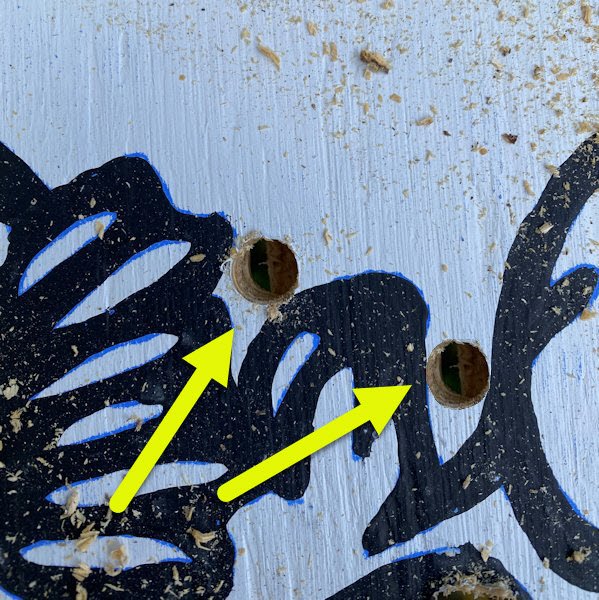 JigSaw Blades Used, Bought this Set at Lowes Bosch 10-Pack T-shank High-carbon Steel Jigsaw Blade Set ( Make sure your Jigsaw takes T-Shank Blades before Buying These ) 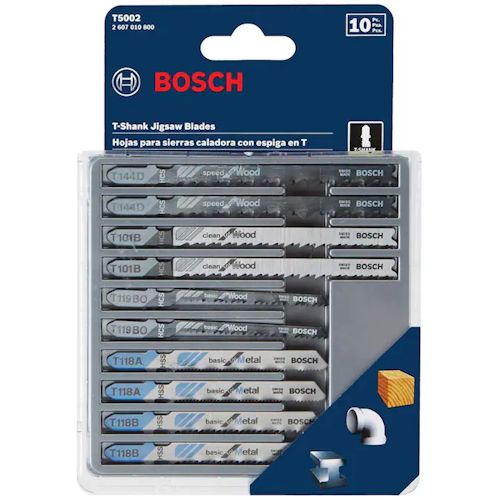 The T119BO is a Scroll Blade Great for Curves (and has 12 Teeth per Inch). The T101B is Great for Cutting the Outside Shape (and has 10 Teeth per Inch) 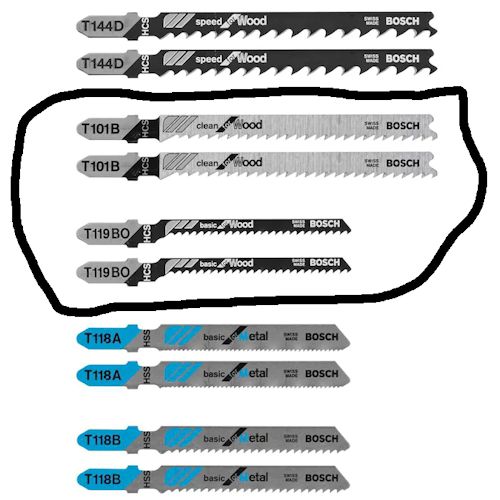 | ||||
|
#13 Here's Our Finished Cut Out Shape 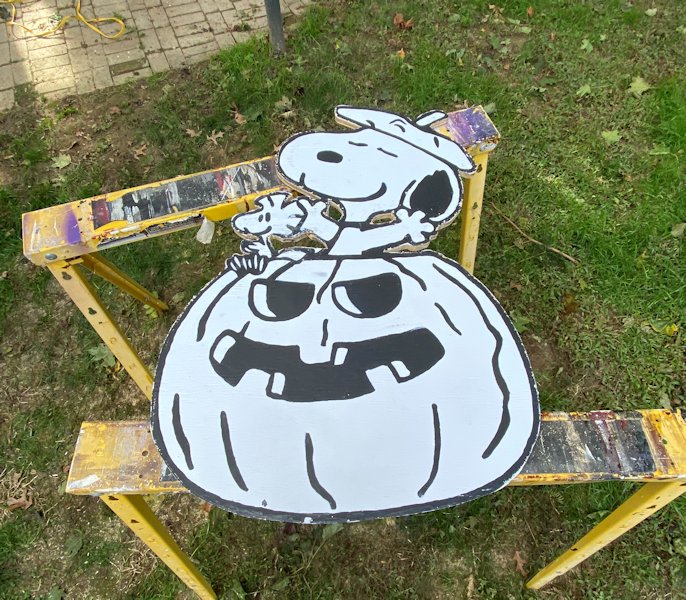 Don't Worry About the Ouside Black Lines getting Choppy or Sloppy Looking. We will fix That Later! If you Like you Can Sand All around the Edges with a Sander. You could Also Use a File for those Inside Small Cuts to smooth those out. | ||||

| ||||
CARVING TOOLS - MEDIA - LINKS - SITE MAP - CONTACT US